When we travel, chances are very high that there is a temple nearby. My husband and I always like to make time to attend a temple session, wherever we go. It used to be an accomplishment to be able to say, “I’ve been to all of the temples.” Now that is next to impossible, but it is definitely worth making an attempt to mark one more temple off the ever-growing list.
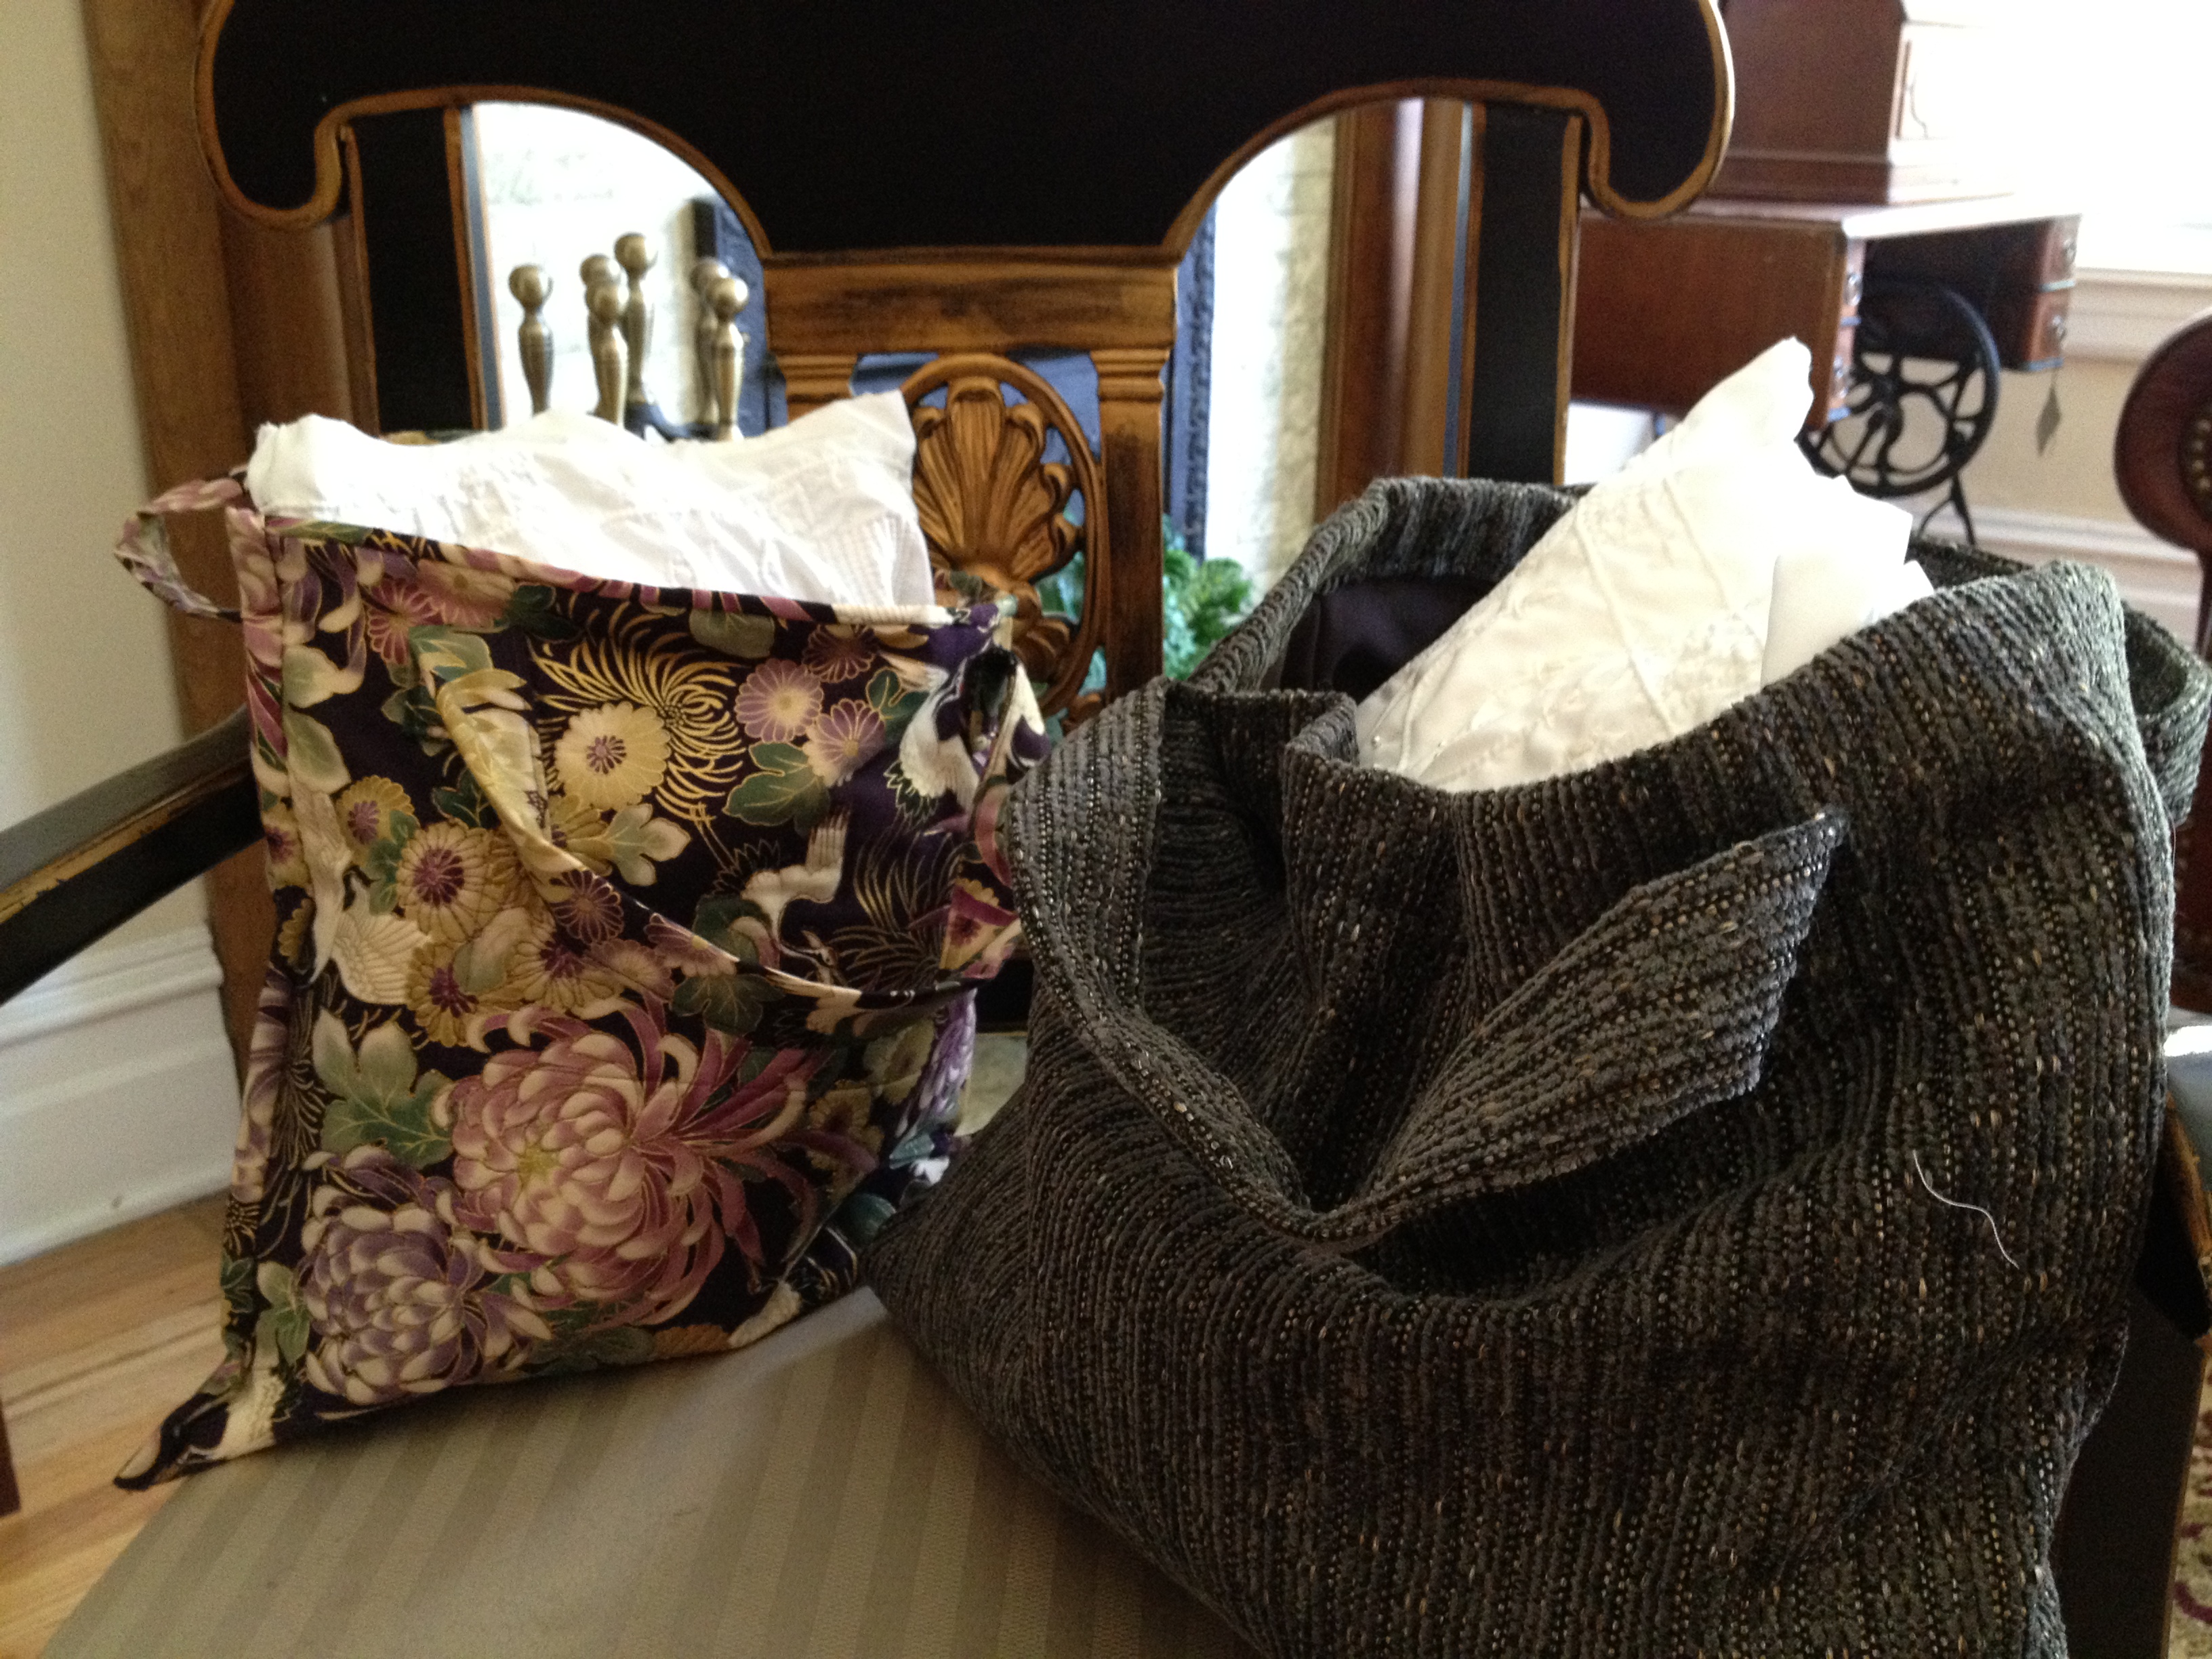
Many temples don’t have laundry facilities or clothing departments, so we need to bring our own temple clothing. My temple bag is a suitcase and does not fit into my luggage. This last time, we flew into Kentucky and I unceremoniously stuck my clothes in a plastic grocery bag. Very embarrassing! I left the temple with a fresh commitment to go home and make acceptable looking bags to carry everything in for next time.
Brenda, from Lexington, Kentucky, contacted me and asked if I had a pattern for making bags and envelopes. She is a temple worker at the Louisville Temple and sees many missionaries holding temple clothing, willy-nilly, in their arms without a bag to put them in. Her stake is planning to make envelopes for a Stake Event. What a great idea!
So, first let’s tackle the Inside Temple Envelope

This is the white envelope you carry with you throughout your session. I made envelopes for each member of my family and went a little crazy with the embroidery. (If you’re interested in the symbolism you see here, check out the Hebrew category on this site to find my husband’s posts.)
These are very simple to make (minus the embroidery), but finding the fabric is kind of tricky. You’ll have to peruse your fabric store. What you’re looking for is a white, somewhat shiny, fabric. You want it to be dressy, with some luxurious body to it. A simple white lining fabric may be your best bet.
I like to line the bag, so it has a finished look to it. Now don’t freak out, it’s easy. Lay out your fabric, keeping it folded like it just came off the bolt.
- Measure 16 inches and cut. The bottom has a nice folded edge and the top has two raw edges.
- Take each raw edge and fold it 1/2″ under toward one another. Iron it and sew the edges together so you have a clean hemmed edge. Make sure you keep everything nice and even.
- With your folded end and your newly hemmed end (you have created a tube now), fold the fabric in half again. Line up your folded edge with your hemmed edge as perfectly as you can get them. Now, pin and sew a ¼” seam along each side edge. Sew from the open end down, so everything stays even.


4. Trim the edges you have just sewn and turn the envelope inside out. I use a seam ripper to pull out the corners. Careful you don’t snag the fabric.
5. Sew another ½” seam completely encasing your first seam along each side. This is known as a French seam. Turn the envelope inside out again and you’re done. Iron everything flat and you have a lined and beautifully finished envelope.
If you would like to add closures, I cut small pieces of Velcro and sew them along the top edges. But this is extra and not necessary.
Now, let’s make the Outside Temple Bag:
There are a million popular purse patterns around these days. Some are pretty complicated and others may be simpler. But this is what I do for the outside bag that carries all my temple clothes.
I recommend using upholstery fabric, or something quilted; something that is strong and sturdy. Having said that, we want to keep the price down, so check out the remnants bin for upholstery fabric. I bought 1 ½ yards for $6 recently, and I think I can make two bags from it. Again, I typically like to line these bags, and lining fabric is usually pretty inexpensive.

This bag needs to be bigger than the envelopes, so I cut mine 20” across. You may want to go even wider.
- Cut your bag the exact same way you cut the envelope, folded off the bolt. You may want to cut off the selvage from the top raw edges.
- Sew up each side of the bag with the right side in.
- Do the same for the lining fabric. Cut the same size (20”) and sew up each side.
-

Check that the bag seam faces out and the lining seam faces in.

4. Keeping the bag with the right side in, turn the lining bag so the right side is out and slip it over the bag. Don’t worry that you can’t get it to lay flat; that won’t matter.
5. Catch the bottom corners of both fabrics and pin them just like this. I’ll tell you why in just a minute.

6. From the top of the bag, turn the hem of the bag fabric over the lining fabric and sew along the edge.

7. Now, go back to the corners and sew along that pin line. This will give you a nice bottom on your bag and secure the lining.

For another bag I made, I quilted everything together first, then I added a binding along the outside edges. This is just a tiny bit more complicated, but not much. I also added a pocket.
8. For the handles, you can buy fat grosgrain ribbon, or make your own.

Cut strips 3”-4” wide. The length is completely your choice. Fold in half, right sides inside, and sew, leaving an opening, so you can turn the fabric right side out. And do yourself a favor—leave a large opening! Then turn your handles right side out. I use a seam ripper to pull out and square the corners. Tuck in both sides of the opening as you sew down the entire right-side edge, or all the way around if you like.

Attach the handles to each side of your bag. It doesn’t hurt to measure to make sure you’ve placed them evenly.
I like to sew a square, or rectangle stitching around 2-3 times to secure it on each of the four ends. And you’re done!

Good luck! And Happy Temple Visiting!!!

For years I’ve been meaning to make up an envelope pattern and make myself a really nice one. Now you’ve done it for me–thank you!
Does anyone know where I can get a crochet pattern for crocheted Temple Envelope?
I am a professional seamstress and have been wanting to make a temple envelope. I just don’t seem to get your instructions . Maybe more pictures would have helped. 🙁
@Karlene – my mother crocheted an envelope for me long ago using a placemat pattern. Beautiful lace motifs, folded in about thirds with a flap at the top. Sadly, way too small. Still the idea holds. Pinterest has countless crochet ideas and patterns. It might even be possible to find a mandala or other pattern of dense, dimensional stitches to adapt to your preferred size. Any lace motif could also be adapted for size. Personally, I would block a finished lace, sew it to a lining, and then construct the envelope.
@maartje winston – I think she is talking about making the fabric self-lined prior to actually constructing the envelope with french seams along the sides.
Thank you for this site.
I have just made my very first temple envelope and it is lovely I made up my pattern.
PLEASE give clearer instructions for the envelope. I would like to make this, but the instructions have me confused.
How wide is your material. It seems that now we have 45, 55 and 60 inch. I understood the french seams and the 16″ width but what is the length?
I think the bigger bag was made from 60” fabric. Wider fabric can be easily adjusted to suit your need.
Anyone know if members can make their own clothing (besides the apron (there’s some pretty awesome symbolism in making just the apron yourself) and excluding the garment itself)
I’m afraid not.